
Let’s walk you through how to add your first Product on WooCommerce, step by step — directly from your WordPress Dashboard.
No stress. No coding. Just click, fill in, and launch your product.
⚠️ Please Note
This guide is intended to assist with commonly used software tools. While we strive to enhance your experience wherever possible, setup and technical support for third-party applications fall outside the scope of our services.
Index
How to load a Product
Watch the Video
Frequently Asked Questions
Pro Tips
Useful Links
How to load a Product
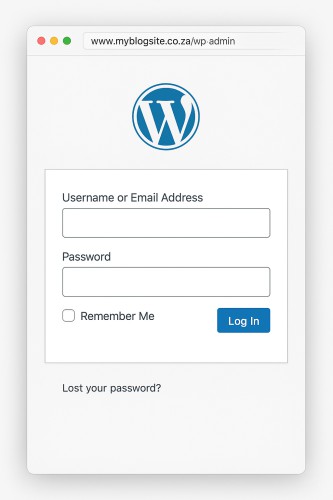
Step 1: Log into Your WordPress
Log into WordPress enter your login credentials, and click Log In.
Step 2: Open the Products Section
In the left-hand menu:
Products → Add New
This will take you to the product editor where you can enter all the details for your first item.
Step 3: Add Product Title
- Product Name: This is what your customers will see as the product title.
- Description Box: Add a full description of your product. (Optional)
- Short description: Tell customers what they are buying (Recommended)
Step 4: Set the Product Type
Scroll down to the Product Data section.
Make sure “Simple Product” is selected in the dropdown (it’s the default). You can leave Virtual and Downloadable unchecked unless you’re selling digital goods.
Step 5: Set the Price
Still in the Product Data section:
- Regular Price: Enter the standard price.
- Sale Price: Enter a discounted price if you want to run a sale. (Optional)
Step 6: Add Product Short Description
This shows next to the product image on your site — keep it short and punchy!
Step 7: Add Product Images
On the right-hand side:
- Product Image: Click “Set product image” to upload your main product photo.
- Product Gallery: Add more images (e.g. different angles, close-ups)
- Recommended Sizes: 500px x 500px .jpeg files
Step 8: Assign Categories & Tags
Use categories to organize your products (e.g., “T-Shirts” or “Honey Jars”).
You can also add tags like “organic,” “handmade,” or “limited edition” to help customers filter and search.
Step 9: Click “Publish”
Once everything’s ready, hit the blue Publish button in the top right.
Boom! 🎉 Your first product is live on your WooCommerce store.
Add your first product Video
Frequently Asked Questions
Have Questions of your own? Contact us
💡 Pro Tips
Add Product Image
Use Quality Images
500 x 500 pixel Images
Use .jpeg .png or .webp
Don’t mix image resolutions


